Modifying and Repairing the OSI Strasse Orgel
These short notes describe problems and changes I have either
made or heard about from others. If you have made changes to an
OSI Strasse Orgel, please send me a note describing your work so I
can pass it along to others.
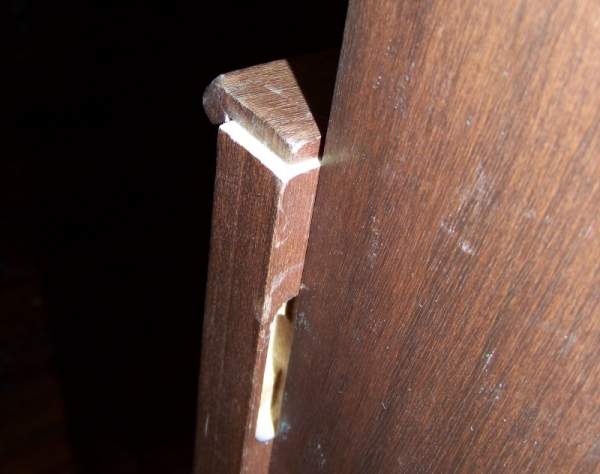
Swollen Front
The lower front panel was constructed as a single glued-up
piece. Humidity caused these panels to swell, increasing the width
by up to 3/8 inch. The close-up photo below is taken from behind
at the catch end. In some cases the panels warped as well.
According to Paul Fischer, in a few cases OSI inserted braces into
the back of the panel. Our case front stayed flat, with the only
issue being exposed unfinished wood, so we just lived with it. I
did have to move the part of the latch installed on the door. My
new lower panel described below addresses the issue.
Rough Plexiglass
The plexiglass panel inside our organ had rough, saw-cut,
edges. Paul Fischer said this was also an indication that it is an
early organ, and that these were smoothed on later organs. In some
cases, early organs had wires abraded on the panel edge. I used
sandpaper to round and smooth the edges.
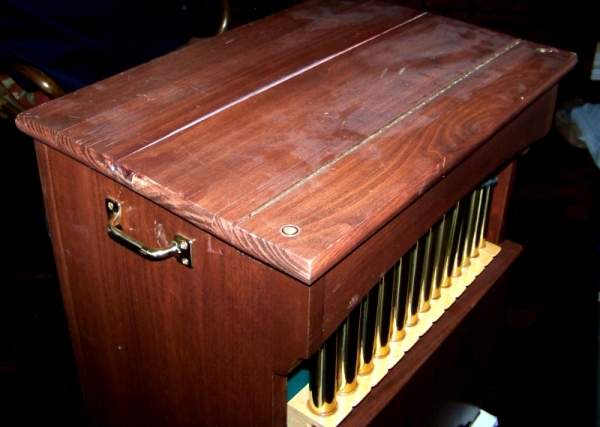
Handles
The Strasse Orgel was supplied without handles, although they
were an option priced at about $35, installed. Most owners have
added some form. I installed brass "screen door" handles from a
home center which cost about $3.50. Without them, loading and
unloading the organ from the car would be difficult.
"Fixing" the Top Panel
The first change I made to our OSI Strasse Orgel case was to
modify the top to accommodate the Combo ReadeR electronic unit.
The original two-piece top worked reasonably well with the
MPV-4000 electronic control unit, although it was a bit of a
bother to disconnect the top brace to access things.
The Combo ReadeR electronic unit has its display on the top face,
and if placed on the plexiglass shelf, it can not be viewed easily
with the original top.
I removed the original top and cut the larger panel in two using a
table saw. Note that the panel should not be cut in half, but the
rear portion should be about 3/4 inch wider than the front in
order to allow the top to angle properly. This is because the
original piano hinge is located at the top surface.

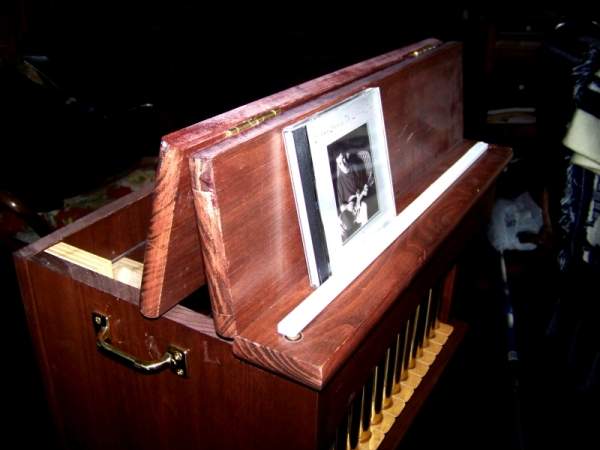
I installed a hook-and-eye to hold the top open, but
allow it to be closed easily.
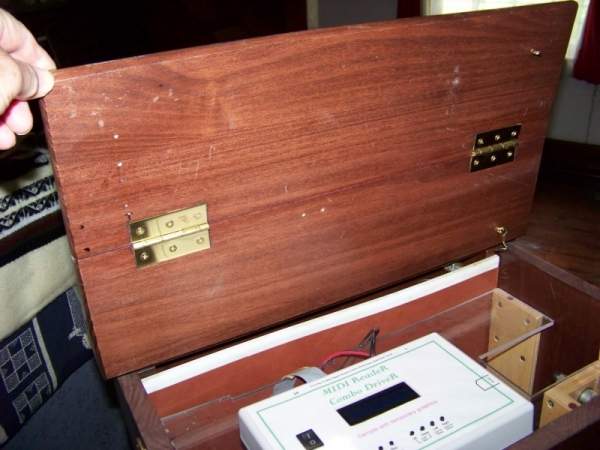
I installed two brass hinges in rabbets (recesses) as
shown below.
I added a 1/4 by 1/2 inch strip of plastic to the front in order
to allow the shelf to be used to display CDs and other items. The
photo shows the strip before I painted it with brown paint and
secured it in place with small brass screws.
Modifying the Front Panels
Since the organ belongs to Norma and I don't want to make
changes without her approval, my changes to the front were done as
new work, with the original panels being retained in case she want
to reverse my modifications.
My new upper panel was made from a poplar 1 by 3 purchased from
Lowes®. I used a planer to reduce the thickness to match the
original panel. Since the original curved front was about 3 1/2
inches wide at the ends, I left the lower edge straight so that
the center width would be adequate. I made new end blocks to match
the originals.
I made the lower "gold" trim strip from some 3/8" poplar with a
rounded edge which I had in hand, and painted it with crafter's
paint. The letters are die (or possible laser) cut plywood from a
craft store.
Since Norma was unsure about how she would like to decorate the
lower panel, I made it as a "framed panel" with a removable
plywood center. I used poplar from Lowes, and used
mortice-and-tenon construction.
The "painting" on the insert shown in the photos was created in
PaintShop® and decoupaged in place using polyurethane
semi-gloss finish. I had used decoupage decorations on my Smith
Senior 20, but in that case I used the water-based ModgePodge®
medium. If you decide to try this type of decoration, be sure to
run a test to make sure that your "varnish" does not dissolve your
printer's inks and cause bleeding.
I went through a number of experiments in trying to matching the
original finish. My final process was to color some polyurethane
semi-gloss finish with wiping stain. This created a
semi-transparent color similar to the spray used by OSI, and by
adding several coats I could adjust the color density.
I'll add photos of this as soon as the varnish is dry and the
panels are installed.
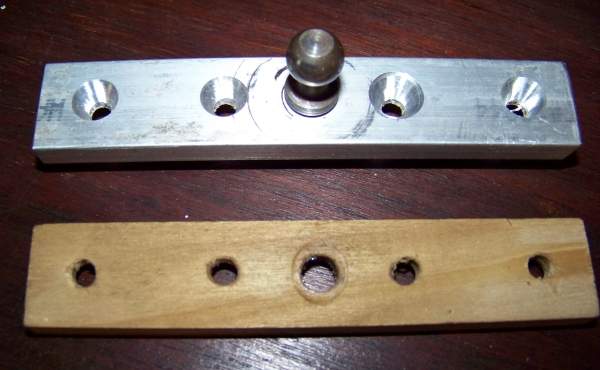
Fixing the Lower Link Ball-Joint
In July 2011 the lower ball-joint on the bellows drive popped
off. I found that the ball-stud was loose, allowing the stud to
rotate too far and nudge the socket off. (When I made the repair,
I found the hole was actually elongated.) I was able to reach down
through the plastic panel and tighten the stud, but it started
working loose again. It was at that time that I met Paul Fischer.
He observed that the stud was mounted in a wooden piece, and said
that it was evidence that we had an early organ, and that a metal
bar was used in most of the organs.
I had already decided that the wood should be replaced with metal.
Following Paul's outline of the dis-assembly process (Inside the OSI Strasse Orgel),
I installed a new mount made from a 4 inch piece of 1/4" by 3/4"
aluminum bar. I threaded the stud mount to match the stud (it was
a metric thread) and use the original nut to lock the stud in
place. The original wood screw spacing was copied, and I used the
original screws.
Tuning the OSI Organ
I have not needed to do any tuning on our organ.
The organ is tuned to a Carl Frei 20 note scale. It is pitched the
same as most Raffin 20er and John Smith Busker organs, with the
lowest note being MIDI No. 53. Most of the organs will be tuned to
a "well tempered" scale with an electronic tuner, but a true scale
in Bb or F might be chosen as a better-sounding alternate.
Given that most small MIDI output boards have 32 notes available,
if the OSI organ had been designed from scratch, a 22, 26 or 31
note scale might have been chosen, but the organ was based on the
Hofbauer 20 Mikro which was in turn derived from a Hofbauer 20er
roll playing organ. Given the proprietary electronics,
availability of music was probably not a serious issue.
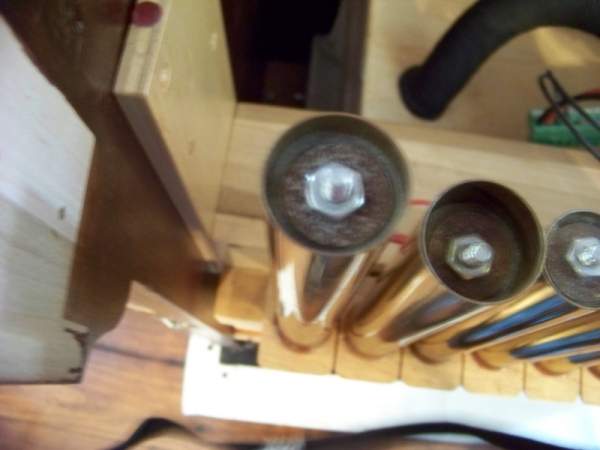
Paul says that if the "cork seals" on the tuning plugs on the
brass pipes have a tendency to slip, add a little silicone
sealant at the top of the plugs after tuning.
Paul also said that if the tuning plugs on a Hofbauer 20 note
organ get pushed down too far, the solution is to break the pipes
loose and push the plugs up from the bottom. He did not say so,
but I assume the same would apply to the OSI. Some of our pipes
have come loose from the epoxy holding them in place.
Some other owners have had to address tuning issues and report
that an unexpected number of socket wrench sizes are required to
fit the nuts.
Some of our pipes are "a bit loose." The epoxy used by OSI does
not stick completely to the tubes, possibly because of a wax or
lacquer finish used to keep them bright. Our loose pipes have not
fallen out, and I have just straightened them as necessary. I had
thought of sticking them in place with a drop of PVAE glue (Player
Piano Supply's "Plastic Adhesive" or "Aileen's Tacky Glue") and
when I discussed the issue with Dave Wasson he suggested the same
fix.
I lifted out one of the pipes and noted that there is a screw head
on the bottom of the plug. It may be useful to remove the pipe to
access this screw to loosen or tighten the plug. With the pipe
loose, it can be tuned, then the plug tightened with screwdriver
and wrench, then replaced with a tight plug.
Fancy Paint Jobs
A number of owners have had beautiful German style decorations
added to their organs by local artists. This is particularly
effective on the black painted cases.
Regardless of the origin of the OSI design, I prefer to think of
our organ as a late 20th Century American product, and to use
decorations reflecting that.
Links to additional OSI Street Organ information:
My main Mechanical Music page